Release SABIO 5.36
UI Changes
In this release the user interface for tags and categories has been adapted.
Categories
Optional categories
To add optional categories, you can now click on the "Add Category" button. A drop-down menu will open, in which all optional categories are displayed.
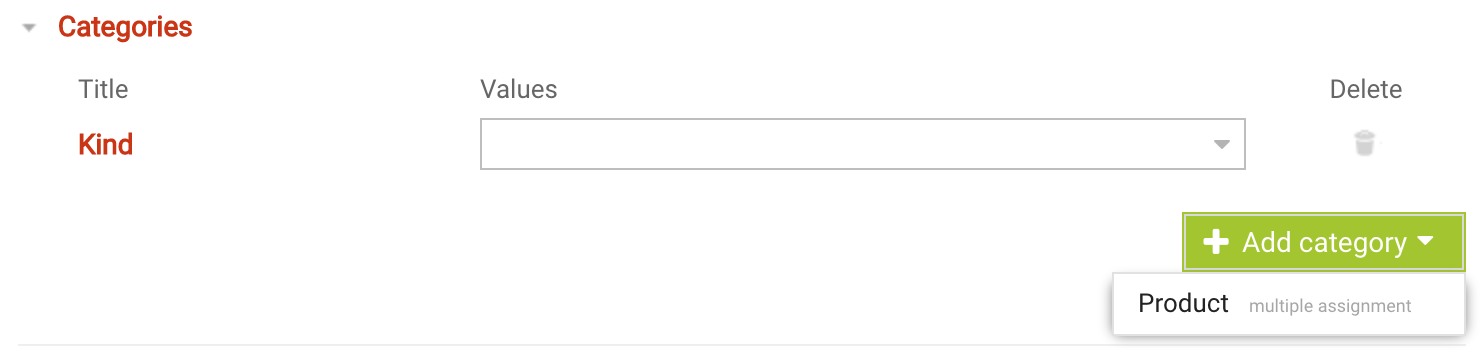
After you have selected the category, it will appear in the list of categories of the respective text.
The values are now also displayed as a drop-down menu. To add values, click on the drop-down menu and select the respective values.
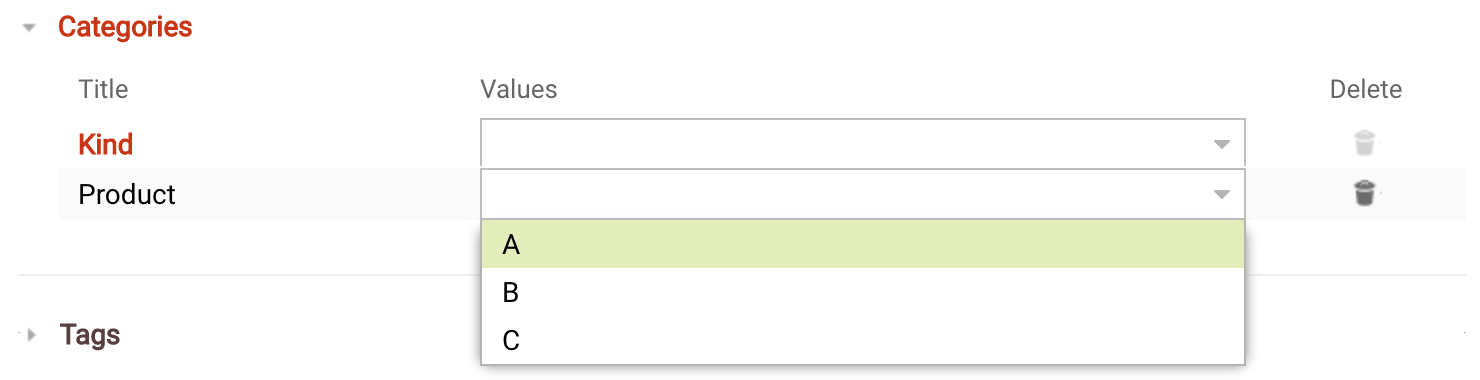
The selected category now disappears from the drop-down menu. If you have selected all optional categories for the text, the "Add Category" button disappears entirely.
Optional categories can be removed by clicking on the trash can and will then reappear in the drop-down menu where all optional categories are displayed.
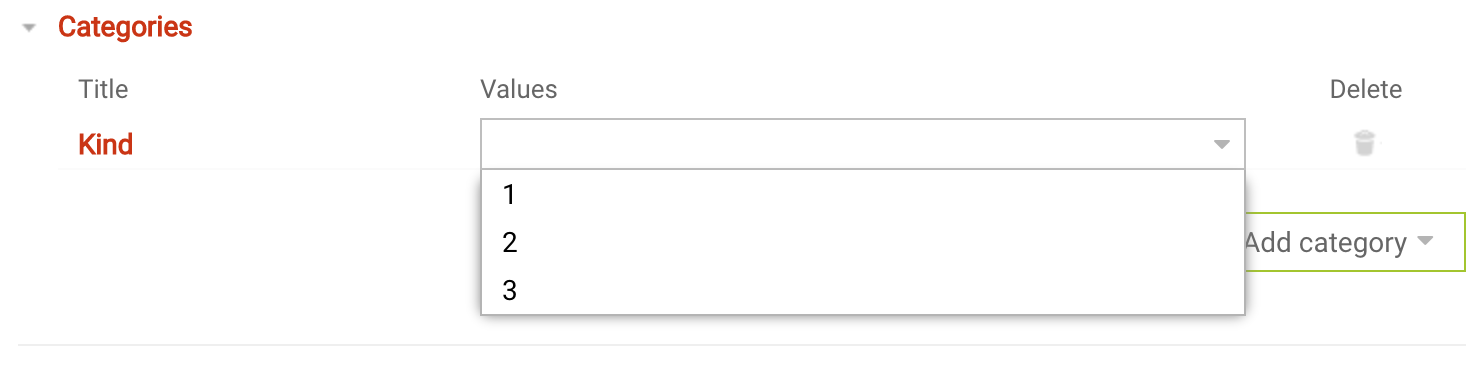
Mandatory categories
Mandatory categories do not need to be added using the "Add Category" button. These are already in the list and are marked red.
Again, you can add them using the drop-down menu.
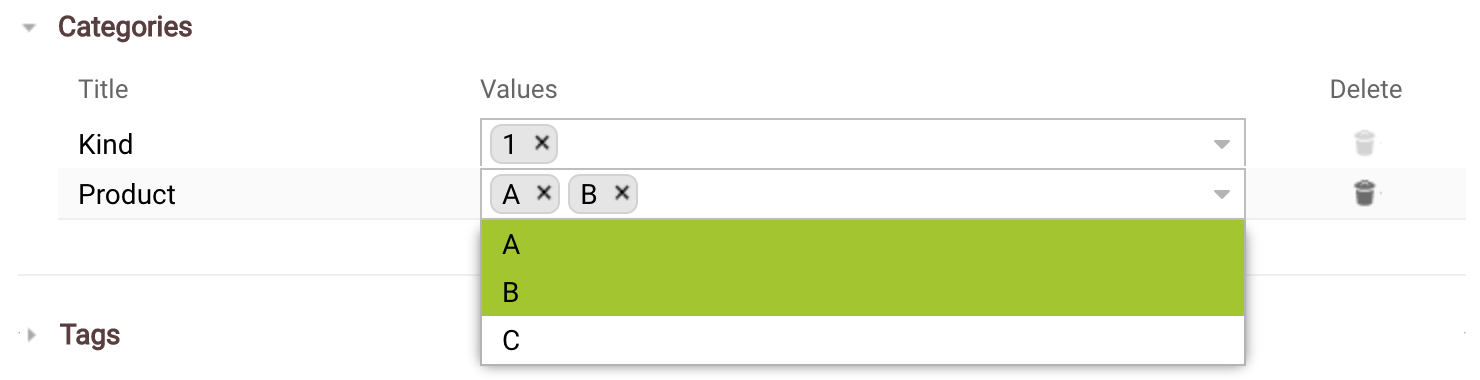
Multiple assignment
If multiple assignment is enabled for the category, the drop-down menu remains open when selecting values, so that you can select additional values. You can close it by left-clicking next to the field.
To remove one of the values, you can either click on it a second time in the drop-down menu or remove it by clicking on the cross.
If multiple assignment is not activated for the category, the drop-down menu closes as soon as you have selected one of the values.
To change the value, you can simply select a new value. The previously selected value will be overwritten with the new value.
If you want to remove the selected value, you can also do this by clicking on the cross on the value.
Tags
Tags are now displayed as single, grayed out tags in the text field.
A comma behind the word turns it into a tag.
Also, a click next to the text field or pressing the return key creates a tag from the previously entered word.

You can delete the tags by clicking on the cross on the tag.
Click here to get to the tutorial.