HTML Editor: Images
How to insert an image:
- Clicking on the button "Image" in the toolbar of the HTML editor.

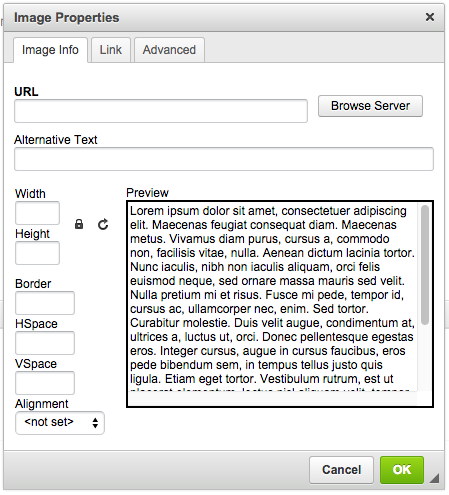
- A window will open, allowing to adjust the properties of the image:
- Clicking on "Browse server" opens the SABIO Image Explorer:
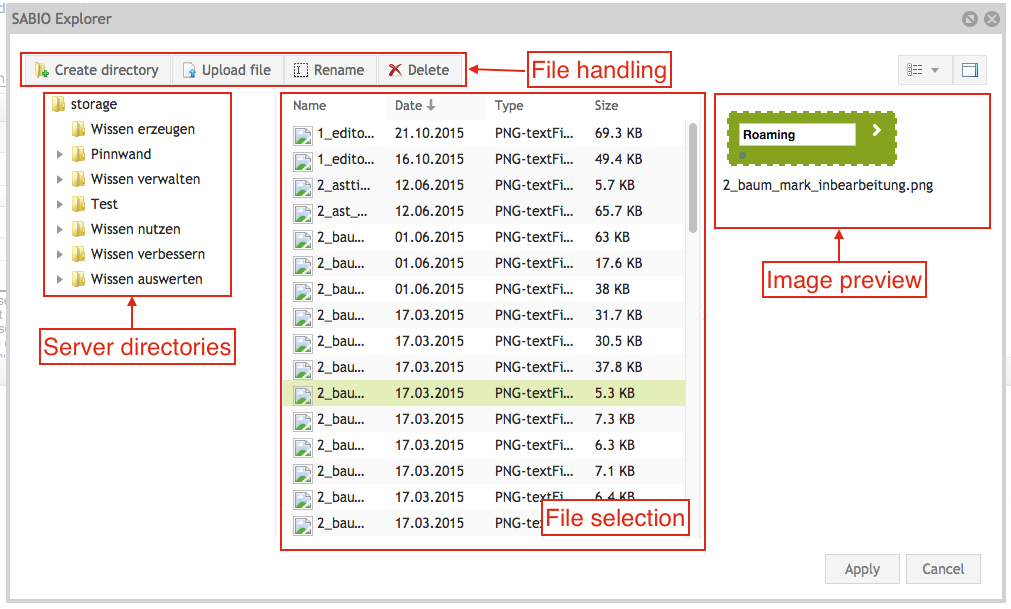
- If the image is not yet saved on the SABIO serve, it can be uploaded from the local computer by clicking "Upload File". Allowed file formats and file sizes
In addition deleting, renaming and the adding of directories is possible.
Note: Only one image can be uploaded at a time due to technical reasons. - When the image file is uploaded it can be selected with a click and a preview will be displayed on the right of the file browser.
Furthermore, a dummy text will be displayed to show how text and image correspond.
- By clicking "Apply" the image explorer is closed and the URL of the image is taken over into the image properties window.
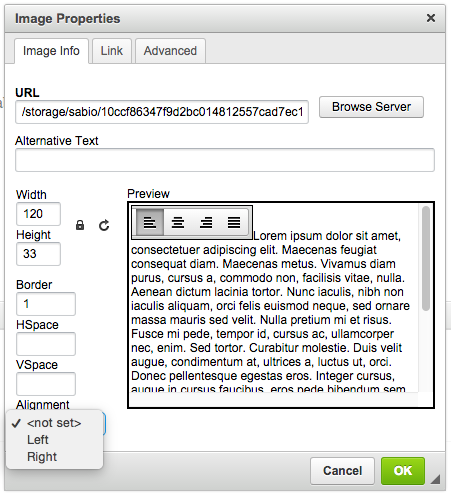
- By now a preview with dummy text will be displayed in the properties too.
The following properties can now be adjusted:
- URL: Normally the url from the image explorer is entered here automatically. This URL can be edited or an external URL can be pasted here.
Note: External images can only be displayed when the SABIO server has internet access. - Alternative text: The entered text is displayed when the image can not be displayed.
- Width and height: Width and height of the image can be entered in pixels here. If the lock icon next to these fields is closed the ratio will be preserved. One click opens the lock and images can be distorted at will.
Clicking on the circular arrow will reset the measurements of the image to their respective original values. - Border: If a border should be shown around the image, it's strength is entered here in pixels. A value of zero means that no border is displayed.
- HSpace and VSpace: The horizontal and vertical spacing to the surrounding text can be entered here and the effects will be displayed in the preview.
- Alignment: This box allows for an alignment of the image according to the text. "Not Set" means that the image will be put in one line with the text. "Left" or "Right" mean that the image will be aligned respectively with the text flowing around the image.
- To create a tooltip, enter the desired text under: Image Properties > Advanced > Title Description
Here is an example:
- Clicking on "OK" will insert the image into the text.
|
Tip: How can I link an image to an URL or a document? In the window with the image properties, there is a tab called "Link". Alternatively and especially recommended for external and document links the image can be selected after inserting it and linked like any other text. Best Practise 1. Insert image
What is the tab "Advanced" good for? Here are additional adjustment possibilities to be found. These functions should only be used by experts in CSS and HTML. |